Art UK has updated its cookies policy. By using this website you are agreeing to the use of cookies. To find out more read our updated Use of Cookies policy and our updated Privacy policy.

Introduction

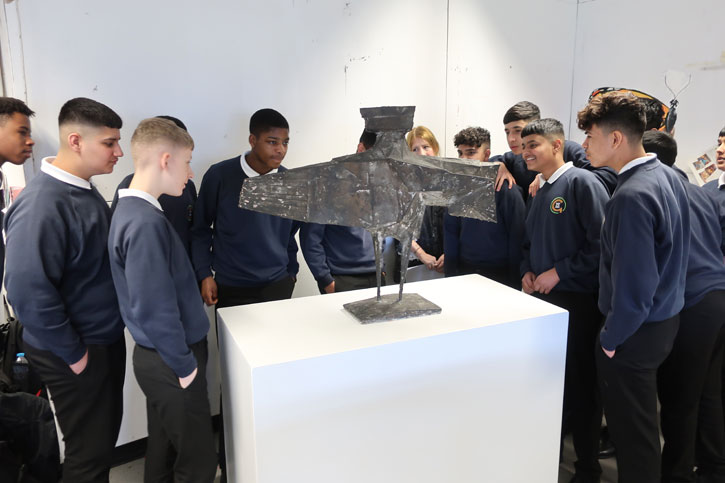
This resource is based on an Art UK Masterpieces in Schools workshop led by artist Zoë Allen with Year 10 students at Jesmond Park Academy in Newcastle upon Tyne. The students explored the sculpture Stranger VII, which is in the collection of the Laing Art Gallery.

Stranger VII

Stranger VII

bronze by Lynn Chadwick (1914–2003). Year 10 students from Jesmond Park Academy, Newcastle upon Tyne, view the sculpture on loan from the Laing Art Gallery

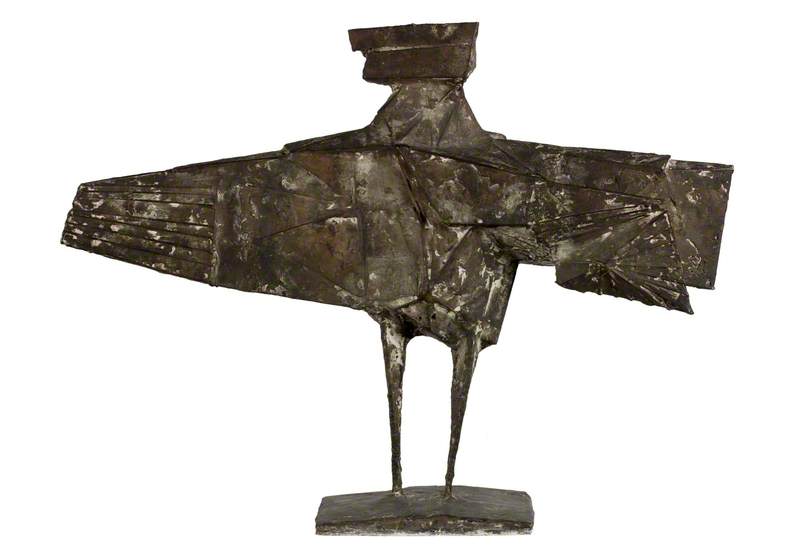
Stranger VII is a large bronze sculpture created in 1959 by British sculptor Lynn Chadwick. The sculpture combines human and bird forms.

Lynn Chadwick is known for his spikey angular abstractions of hybrid human and animal figures and insect-like creatures. Many of the sculptures are winged figures with large ungainly bodies that balance on spindly legs.

Influences and inspirations

During the Second World War, Chadwick flew Swordfish biplanes across the Atlantic. These anti-submarine torpedo bombers were a key weapon in protecting merchant shipping from German U-boats. His experience of flying is likely to have been an influence on his repeated depiction of winged figures. Many of these winged sculptures, like Stranger VII, have double-wing forms inspired by the distinctive boxy double wings of biplanes.

Stranger VII, 1959

Stranger VII, 1959 1959

Lynn Chadwick (1914–2003)

Laing Art Gallery

Chadwick's early training as an architect also influenced his sculptures. In his work we see him experimenting with structure and stability, often using geometric shapes as the basis of his sculptures.

Let's analyse the sculpture

First impressions

Look at and discuss Lynn Chadwick's sculpture Stranger VII as a class. (More views of the sculpture can be found on the artwork page.)

Stranger VII, 1959

Stranger VII, 1959 1959

Lynn Chadwick (1914–2003)

Laing Art Gallery

Ask students to discuss their first impressions of the sculpture.

  • Describe the sculpture.
  • What does it make you think of or feel?
  • What is the mood of the sculpture?
  • What words would you use to describe it?

Teacher notes

The sculpture depicts an abstracted figure with huge, rectangular wings and skinny legs.

Many of Chadwick's sculptures from this period have a menacing, foreboding atmosphere. Made after the Second World War, they are often interpreted as reflecting the distress and trauma caused by the war.

The term 'Geometry of Fear' was coined by art critic Herbert Read in response to the sculptures of Chadwick and other post-war artists including Kenneth Armitage, Reg Butler and Eduardo Paolozzi. Their work is characterised by spiky, tortured-looking animal and human figures with textured, pocked and battered surfaces.

Archaic Head II

Archaic Head II 1952

Reg Butler (1913–1981)

National Galleries of Scotland
 

Form and balance

Now ask students to look at the form of Stranger VII and how it is balanced. 

  • Look at the sculpture from top to bottom and side to side.
  • Would you describe the form as balanced?
  • Are the different parts of the sculpture of equal size and shape?
  • How has Chadwick ensured that the sculpture doesn't topple over?

Teacher notes

The sculpture looks top-heavy, with the winged body appearing too heavy for the thin legs that support it. In designing his sculptures, Chadwick often pushes the structural limitations of balance and stability with large forms balanced precariously on delicate bases or legs.

Chadwick has ensured that the structure and weight of the horizontal wings are balanced equally on either side of the central vertical figure. He has also created a small base to support the spindly legs. This helps to make the sculpture more stable.

Chadwick's early training may have fed into this interest in balance:

  • The Swordfish biplanes he flew during the war, were launched from makeshift aircraft carriers and it took great skill and poise to land the planes on the tiny boats, with balance and timing essential.
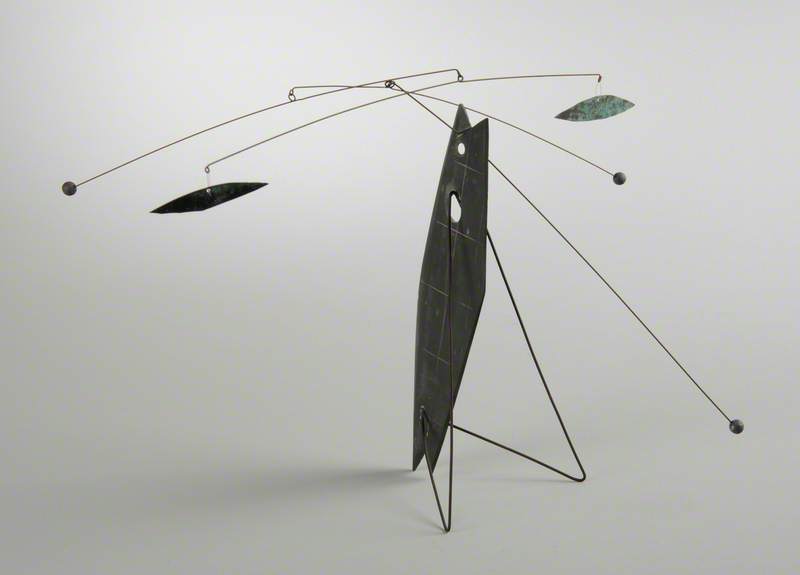
  • Early in his working career, after training as an architect, Chadwick designed and made hanging mobiles for exhibition stands. His earliest sculptures were mobiles – reflecting his interest and early experimentation with balancing structures.

Mobile

Mobile 1950

Lynn Chadwick (1914–2003)

Leeds Museums and Galleries

Balance and counter-balance

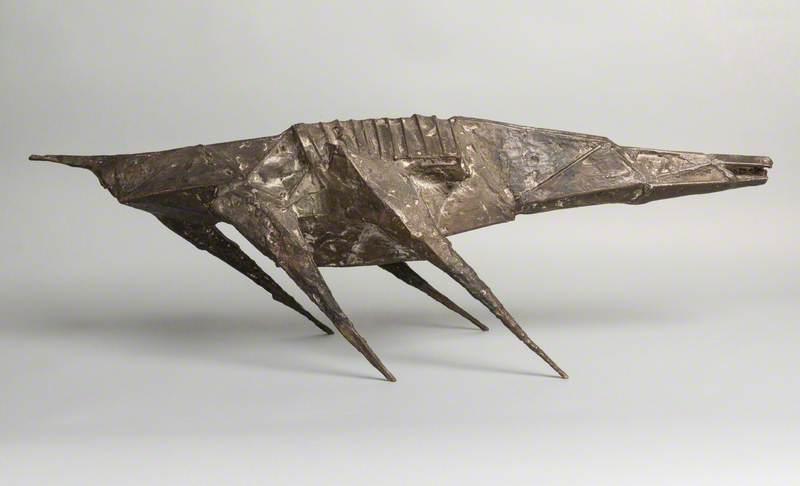
Learning from his experience of designing mobiles, Chadwick often made use of counterbalance in his sculptures. Some of his sculptures stand at such precarious-looking angles they look as if they will surely fall over!

Beast XXI

Beast XXI 1959

Lynn Chadwick (1914–2003)

The Whitworth, The University of Manchester

Beast, an angular animal figure, has a large body balanced on thin legs. The legs are placed far back along the length of the body, adding dynamism to the sculpture (it looks as if it is about to leap!). But this placement of the legs at the back of the body makes the sculpture look unstable.

  • Ask students to analyse how Chadwick has ensured the sculpture is stable
  • How do the angles and placement of the legs counterbalance the front weight of the animal?

Teacher notes

You could demonstrate weight and balance simply, by asking students to try balancing a pencil on their outstretched finger. Point out that the pencil needs to have an equal length on either side of the finger for it to balance. Now add a blob of blu tack to one end of the pencil.

  • How does this change the balance?
  • How far do you have to move the pencil for it to balance again?

Shapes, structure and strength

As his career developed, Chadwick was commissioned to make outdoor sculptures. The shapes of these needed to be strong enough to sustain a larger size – and the elements!

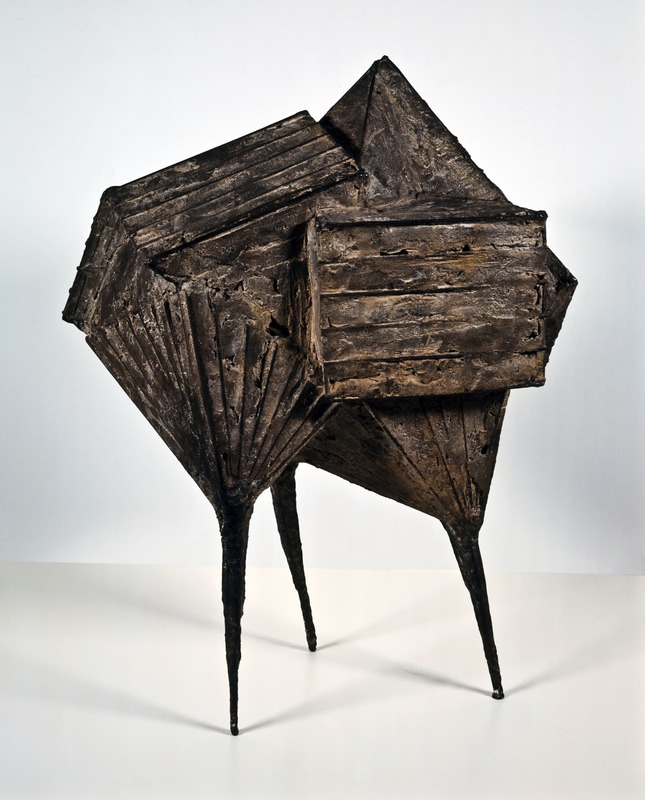
Chadwick's sculptural forms are essentially built around triangles and 3D triangular shapes – he made use of the stability and strength of tripods, cones and pyramids in designing his sculptures. He also often joined triangles together to create cuboid 3D forms.

This sculpture is a maquette (or model) for a larger sculpture called Moon of Alabama

Maquette I for 'Moon of Alabama' II

Maquette I for 'Moon of Alabama' II 1957–1958

Lynn Chadwick (1914–2003)

National Galleries of Scotland

The sculpture has tripod legs with the legs placed on the outer edges of the sculpture to ensure it is stable. The web of interlocking triangles that Chadwick uses to create its bulbous form is similar to the construction principles used by Buckminster Fuller in his designs for self-supporting domes.

Techniques and materials

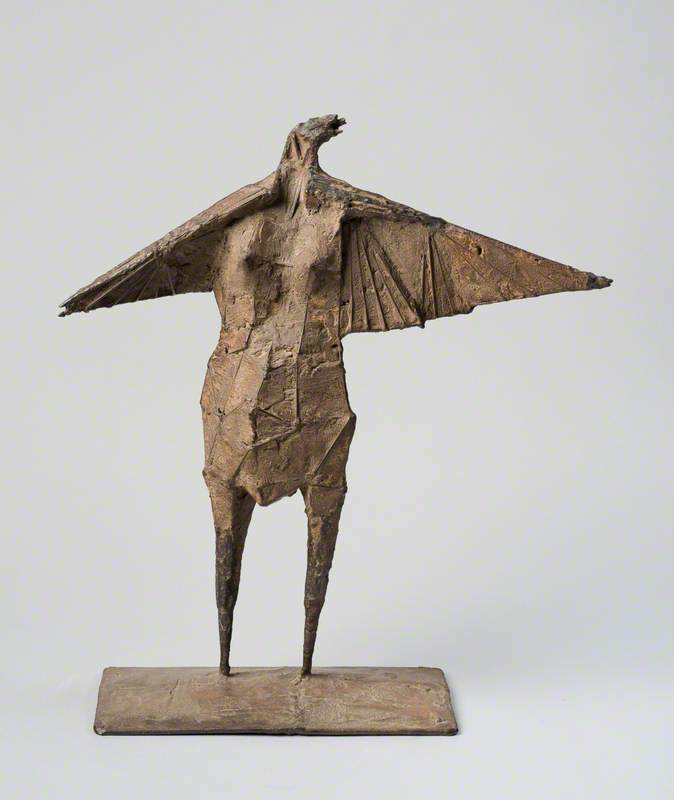
Ask students to look closely at the structure and surface of another winged sculpture by Lynn Chadwick, and to discuss how they think it was made.

Maquette: Winged Female Figure

Maquette: Winged Female Figure 1957

Lynn Chadwick (1914–2003)

The Ingram Collection of Modern British and Contemporary Art

  • Look at the lines and planes visible on the surface of the sculpture. Does this provide any clues about how the sculpture was made?
  • Describe the texture of the sculpture.
  • What do you think the sculpture is made from?

Teacher notes

Chadwick used a linear framework of steel rods to create his sculptures. He welded the rods to join them together so that they radiated out to form a cage-like armature. If you look closely at many of his sculptures, you will see that the lines of the armature are visible, making the figures and beasts look as if they have an exoskeleton. 

He then filled the voids and planes of the armature with an industrial material called Stolit – a mix of iron filings and plaster. Once this had hardened, he could create his desired texture by either carving into it or sanding it down to a smooth surface.  

Chadwick often cast these Stolit and iron structures in bronze so that they were more hardwearing and permanent.

Activity: design and make a winged sculpture

Task outline

For this activity, students will make a winged sculpture that explores form, structure and balance. The sculpture will need to be stable and stand on its own without support.

They will make an armature that outlines the structure in 3D, and then use plaster (or other materials) to fill the armature and create the solid form of the sculpture.

Materials

Students will need:

  • paper and drawing materials (charcoal or pencil or brush and ink)
  • dowelling or strong modelling straws (to create the structure)
  • clay (or masking or sticky tape to attach the dowelling/straws together)
  • plaster
  • scrim or cloth

Students could also use other materials – such as sticks or twigs (or cardboard tubes and plastic bottles from the recycling bin) – for the armature. Corrugated cardboard, plastic bags, old textiles or papier-mâché can be used to help create a solid body for the sculpture.

Method

Step 1. Be inspired

(Teachers note: this step could be set as a homework task.)

  • Look again at Lynn Chadwick's winged sculptures for inspiration.
  • Look at winged sculptures by other artists on Art UK. (Try typing 'winged' into the search box.)
  • You could also explore images of birds and insects to analyse the shapes and structure of their wings.

Make sketches relating to your research in your sketchbook. Annotate the images with notes about the structure of the sculptures and any ideas they give you about how you could approach your winged sculpture.

You could also make notes about the shapes, textures and movement of bird and insect wings.

Step 2. Plan your sculpture

Draw a design for your winged sculpture.

  • Make the shape of your sculpture as dynamic as possible.
  • Think about the form of your sculpture, and how it will balance.
  • Think about what an armature for the sculpture might look like and draw this framework.

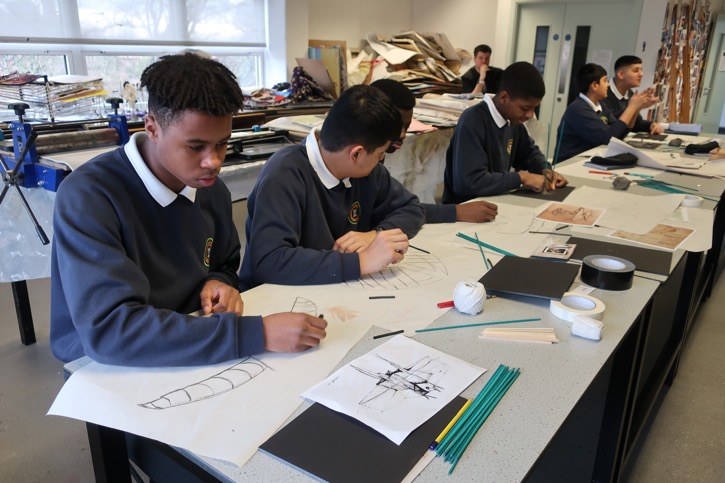
Jesmond Park Academy students sketch their ideas in charcoal

Jesmond Park Academy students sketch their ideas in charcoal

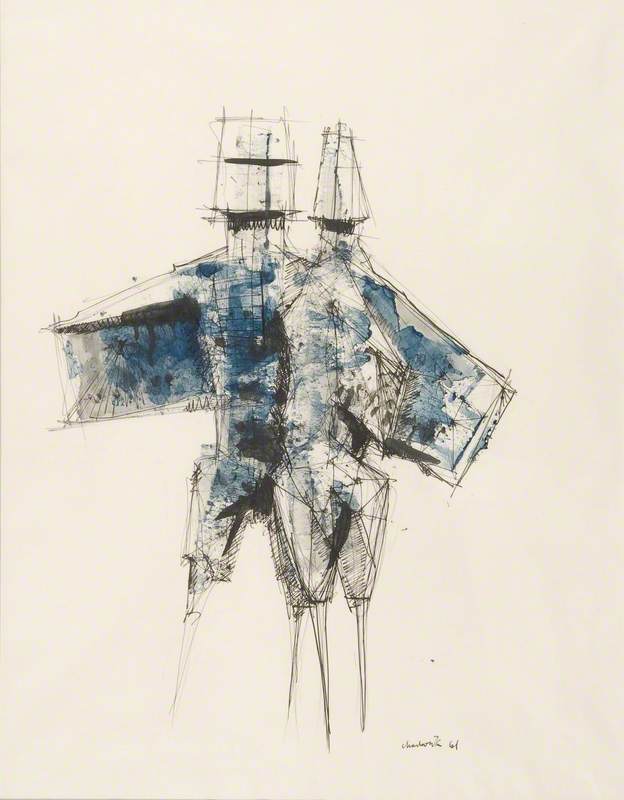
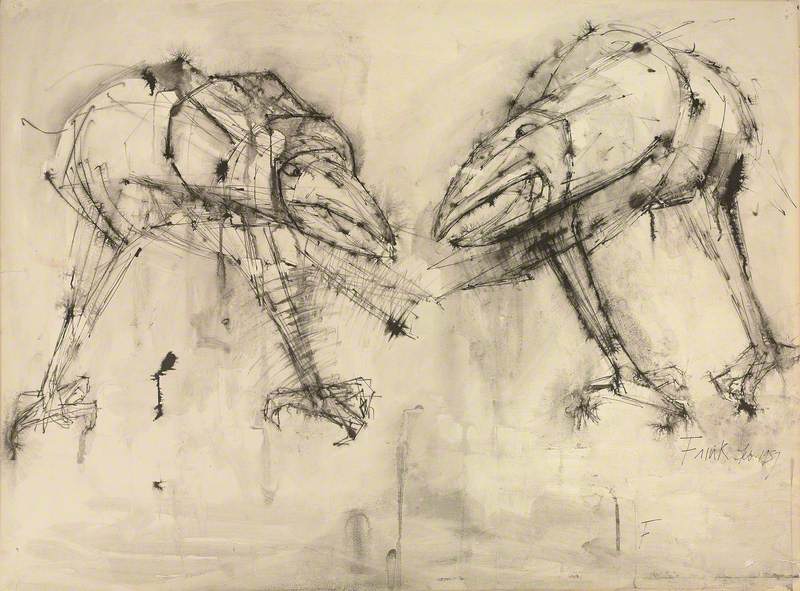
Lynn Chadwick often 'drew' his sculptures in three dimensions using steel rods. But he also made sketches of his sculptures (often after they were finished). In this sketch, he suggests the sculpture's three-dimensional form as well as its texture – and its mood!

  • Using Chadwick's drawing technique as inspiration, imagine how your sculpture might look and the effect you want it to have on the viewer. Try to put this across in your planning drawings.

Study for a Sculpture

Study for a Sculpture 1961

Lynn Chadwick (1914–2003)

Jerwood Collection

Step 3. Make an armature

Make an armature for your sculpture using wooden rods or dowelling.

You could also use wire, twigs, sticks or strong modelling straws. (Another option would be to use plastic bottles and cardboard tubes to create an armature.)

Use clay, plasticine or sticky tape to attach the rods together. 

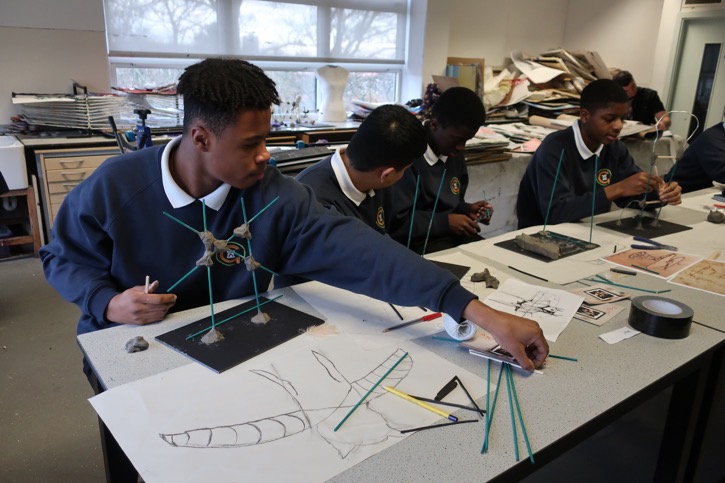
Students begin to build their sculptures using wooden sticks and clay

Students begin to build their sculptures using wooden sticks and clay

Your armature will need to be strong and stable to support the material that will be added to the sculpture.

  • Think about the angles and shapes that you create.
  • Think about the legs of your creature or how it will stand. (Some of Chadwick's sculptures have three legs rather than two – does this make the sculpture more stable?). It may take a bit of experimentation…

Step 4. Build up the form of your sculpture

Add a plaster covering. In the workshop, students used scrim dipped in plaster to cover their sculpture, draping the scrim over the armature to create body and texture.

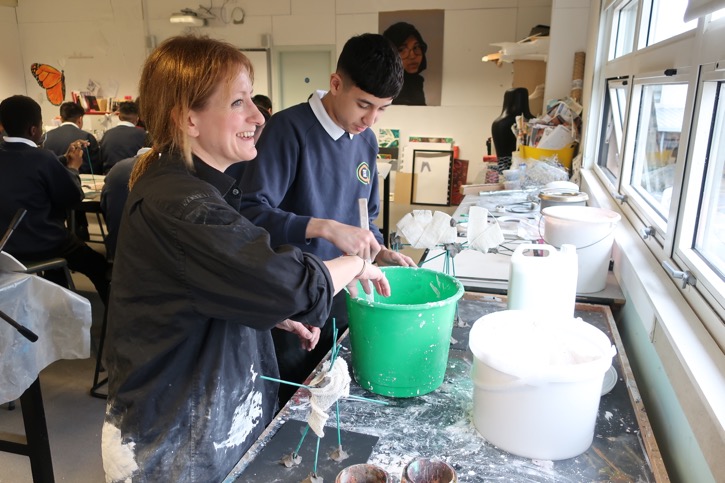
Zöe supports a student to wrap their sculpture in bandage and apply plaster

Zöe supports a student to wrap their sculpture in bandage and apply plaster

If you want to avoid plaster, you could use papier-mâché.

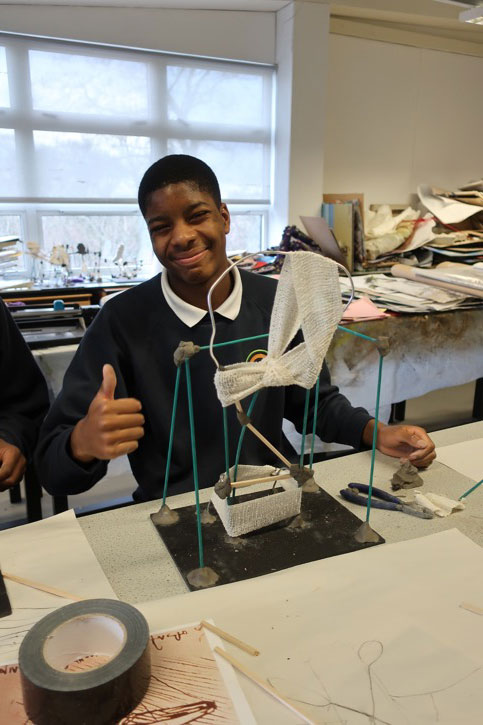
If you are using modelling straws for your armature, fabric or paper would be a lighter alternative to attach to your armature. Use fabrics or papers with a range of textures.

(Chadwick was inspired by the structures of biplanes which were constructed by stretching canvas – and later thin sheets of metal – over a frame. So attaching fabric or card to your armature would be in keeping with Chadwick's ideas!)

A sculpture design inspired by a hot air balloon

A sculpture design inspired by a hot air balloon

Step 5. Finishing touches

You could add more texture once your plaster has dried by cutting or scratching grooves and marks into the surface of your sculpture.

Or consider using paint to add texture and drama to your sculpture. (Use black or a dark colour for that bronze Geometry of Fear look!)


Do you know someone who would love this resource?
Tell them about it...

More Art UK resources

See all